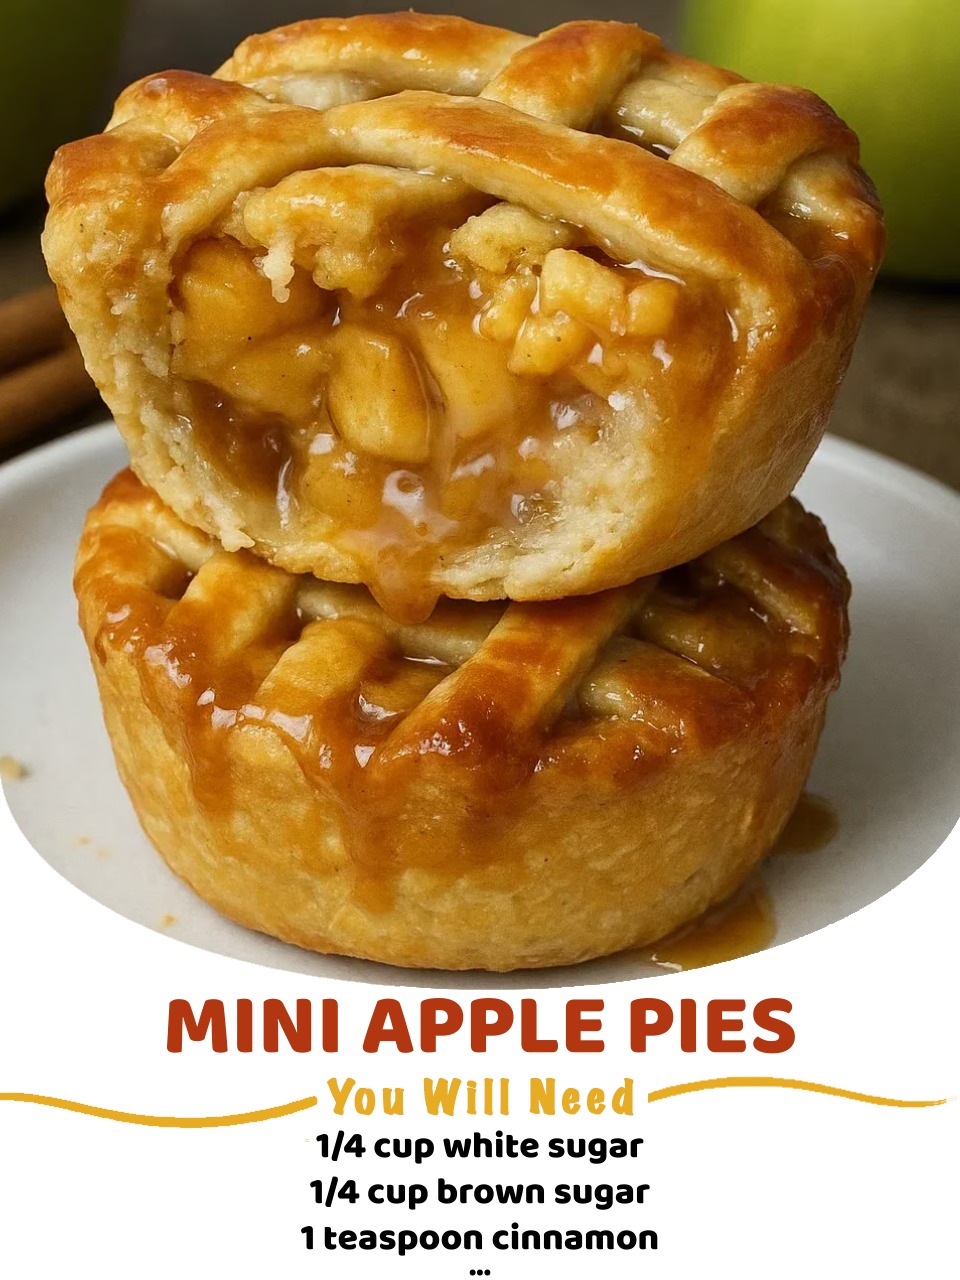
Warm Apple Bites
These mini bites combine buttery crust with spiced, diced apple filling to create a warm snack that’s easy to make. Start by greasing a muffin tin and pressing pie crust circles into place. For the filling, dice small apple pieces and mix with vanilla, sugar, cinnamon, and nutmeg until coated. Add this mixture to the crusts, then weave extra strips of crust into a lattice top. Lightly brush on egg wash for a golden hue, sprinkle sanding sugar, and bake until bubbly and golden brown. Cool slightly before serving warm or keep them for later. Perfect with coffee, tea, or as a small dessert for any occasion!
These handheld apple tarts pack all the yummy goodness of a full-sized apple pie into cute personal portions. They’re just the thing for parties where you don’t want the hassle of cutting slices. Each little delight combines buttery pastry with sweet, spiced apples for a mouthwatering treat that’s perfect when fall arrives.
I whipped these tiny pies up for my autumn gathering last year, and they vanished right away. Folks couldn’t resist their adorable look and traditional apple flavor. Now I make them whenever I need something impressive but don’t have all day to spend in the kitchen.
What You’ll Need
- Store-bought pie crusts: Save time while still getting that flaky, tender texture
- Granny Smith apples: Deliver just the right mix of sour notes and firmness during baking
- White sugar: Adds sweetness without masking the natural apple taste
- Brown sugar: Brings rich, molasses-like flavor that works magic with apples
- Cinnamon: Creates that cozy spice and signature smell we all love
- Nutmeg: Adds wonderful complexity that works wonders with cinnamon
- Regular flour: Helps soak up juice so your crust stays crisp
- Vanilla extract: Gives a subtle sweet backdrop that ties everything together
- Egg mixture: Brushed on to make that beautiful golden top
- Coarse sugar: Sprinkled on top for sparkle and extra crunch
How To Make Them
- Set Up Your Kitchen:
- Get your oven going at 425°F and lightly spray your muffin tin. This hot temperature makes the crust super flaky while cooking the apples perfectly without burning anything.
- Mix The Egg Coating:
- Stir one egg with a tablespoon of water until totally smooth. You’ll use this to stick your lattice pieces down and give your pies that lovely golden color.
- Get The Filling Ready:
- Cut your peeled apples into tiny cubes (about ¼ inch). Small pieces cook more evenly and make these mini treats easier to bite into. Mix thoroughly with vanilla, flour, both sugars and all your spices until every apple bit has some coating.
- Shape Your Pie Shells:
- Cut out twelve 4-inch circles from your pie dough and push each one gently into a muffin cup. Make sure the dough goes all the way up the sides without tearing.
- Brush The Inside:
- Paint the inside of each little crust with your egg mix. This helps keep the juice from making your bottom crust soggy as it bakes.
- Add Your Apple Mix:
- Share the apple filling equally between all twelve shells. Don’t pack them too full or they’ll bubble over during baking.
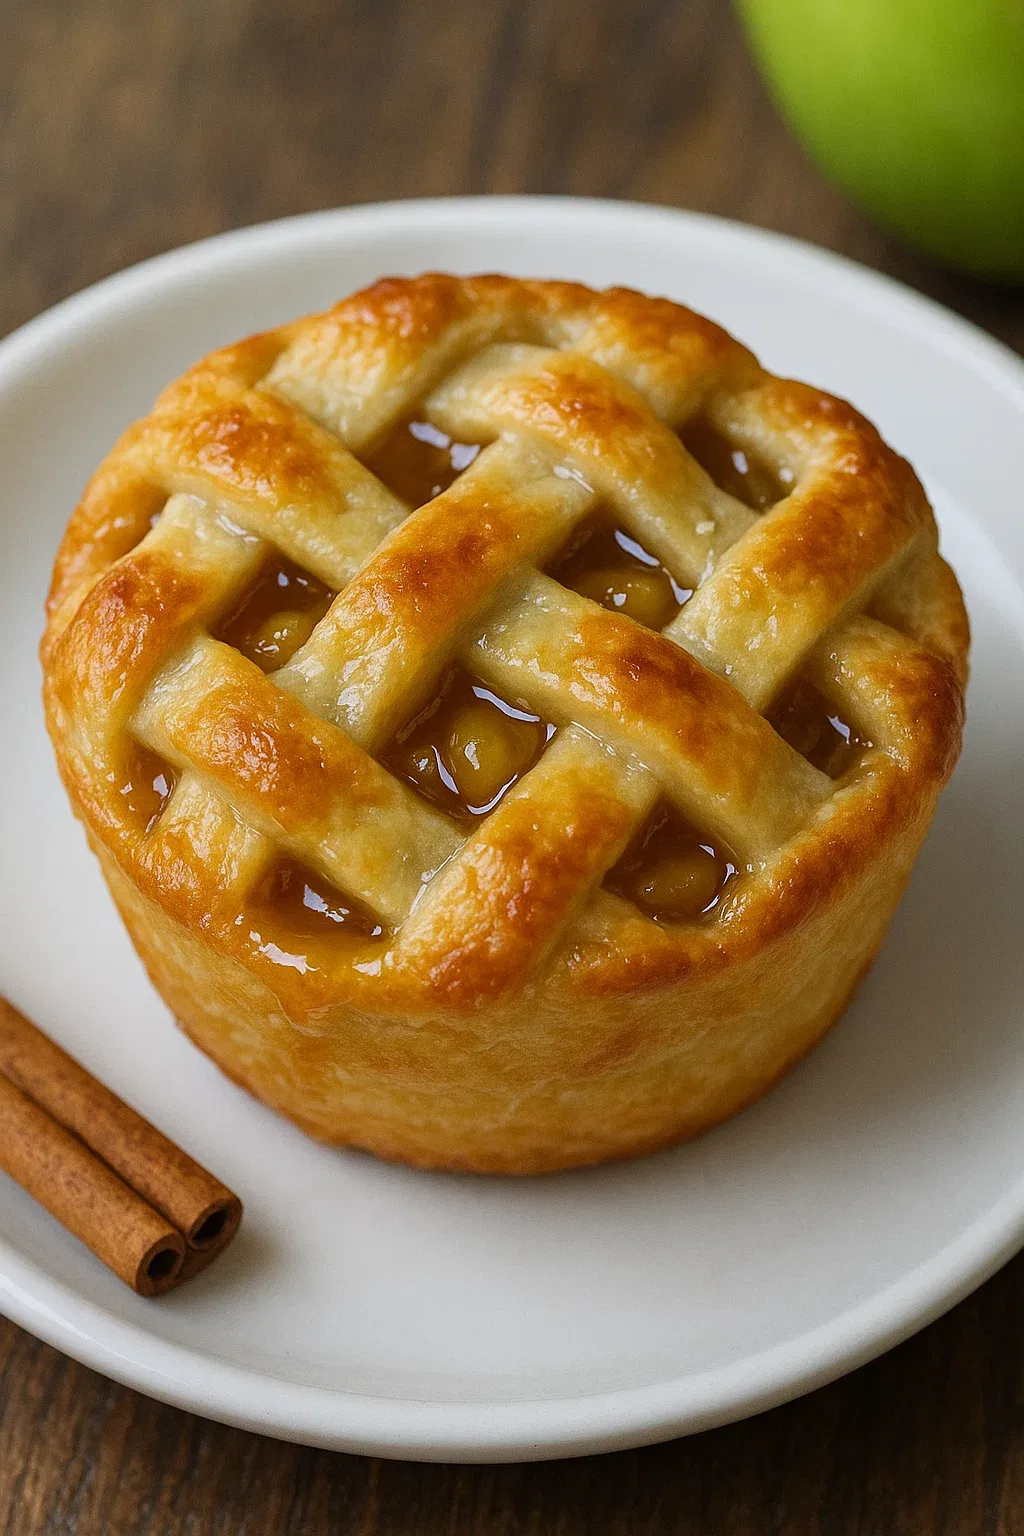
- Make The Criss-Cross Tops:
- Roll out your leftover dough scraps thinly and cut into strips. Weave six strips across each tiny pie in a criss-cross pattern, trim the extra bits, and press the edges down to keep everything in place.
- Final Touches And Baking:
- Brush the tops with more egg wash and sprinkle some coarse sugar on top. Bake for 20-25 minutes until they’re golden brown and you see bubbling through the gaps.
I found out that getting the right mix of cinnamon and nutmeg really matters in these little pies. My grandma always told me nutmeg should be subtle in apple pie, and this small quarter-teaspoon adds just enough warmth without taking over the sweet apple taste that makes these mini treats so good.
Keeping Them Fresh
These tiny apple pies stay tasty on your counter for a day if you cover them with a cake dome or loose foil. If you need them to last longer, put them in the fridge in a sealed container for up to four days. When you want to eat them, warm them up in a 325°F oven for about 10 minutes to bring back their just-baked feel and smell.
Creating Pretty Tops
Making those fancy criss-cross tops isn’t as hard as it looks with these small pies. The trick is cutting strips that aren’t too skinny or too thick for the small space. About ¼ inch wide works great. If your kitchen gets warm and the dough starts feeling too soft, just pop it in the fridge for 5-10 minutes until it firms up again.
 Pin it
Ways To Enjoy Them
These mini pies taste amazing by themselves, but they’re even better with some extras. Try them slightly warm with a small scoop of vanilla ice cream, some caramel drizzled on top, or a bit of lightly sweetened whipped cream. For breakfast or brunch, pair them with a slice of sharp cheddar cheese for that classic mix that balances the sweetness perfectly.
Frequently Asked Questions
- → Could I use a homemade pie crust?
- Sure! A homemade crust works beautifully. Just roll it out to a similar thickness as the store-bought versions so it bakes evenly.
- → What are the best apple types to use?
- Granny Smith apples are great since they bake well and add a nice tart touch. Other sturdy apples like Braeburn or Honeycrisp will work too.
- → Can these be prepped ahead?
- Yes! You can make them ahead and store them at room temperature in an airtight container for a day or pop them in the fridge for up to four days. Just reheat to enjoy again.
- → Is egg wash a must-use step?
- No, but it helps give the crust a golden, shiny look and keeps the sugar in place. Skipping it won’t affect the flavor, just the appearance.
- → What stops them from sticking to the pan?
- Coat the muffin tin with nonstick spray beforehand, and when removing, use a thin spatula or knife to gently loosen each pie.
- → Are these freezable?
- Definitely! Fully baked pies can stay frozen for up to three months. Make sure they’ve cooled, then wrap tightly and store. Reheat in the oven when ready to serve.
Warm Apple Bites
Juicy apple filling and buttery crust—perfect for fall vibes!
60 Minutes
20 Minutes
80 Minutes
Ingredients
Instructions
Start by heating your oven to 425℉. Lightly coat a standard 12-cup muffin pan with cooking spray, then leave it aside.
Beat an egg with a tablespoon of water using a fork, then set it aside for later.
First, peel the apples, remove the cores, and chop them into tiny cubes, about a quarter-inch. Throw them into a medium bowl and add vanilla, flour, white sugar, brown sugar, cinnamon, and nutmeg. Mix thoroughly until they’re totally coated, and set aside.
Roll out the pie crusts and cut out 12 circles using a 4-inch round cookie cutter. Carefully push each circle into a cup in the muffin pan.
Using the egg wash, brush the base of each crust.
Scoop the apple mixture evenly into all the crusts in the muffin tray.
Take the leftover crust pieces and roll them out thin. Slice strips (less than a quarter-inch wide) using a knife or pizza cutter. Lay about 6 strips on top of each pie in a crisscross pattern, trimming the extra dough and pressing down the edges to keep everything tight.
Brush the lattice tops with egg wash, and sprinkle sanding sugar on if you’d like.
Place the muffin pan in your preheated oven. Bake for 20-25 minutes until the crust is a light golden color and the filling bubbles.
Take the muffin pan out and let the mini pies rest for about 5-10 minutes. Gently remove them from the pan using a spatula or thin knife if needed, then place on a wire rack to cool completely.
Eat these mini pies warm or cool. Wrap any leftovers and leave on the counter for a day, or pop them in the fridge for up to four days.
Notes
- Use a 4-inch cutter to keep crust circles the same size.
Tools You’ll Need
- Standard muffin pan (12 cups)
- Round cutter (4-inch)
- Medium-sized bowl
- Fork
- Knife or pizza cutter
- Cooling rack for pies
- Nonstick spray for baking