This post may contain affiliate links, please see our Disclosure for details.
Lazy Day Lemon Cream Pie Bars
I’ve fallen head over heels for these Lemon Cream Pie Bars that bring sunshine to even the cloudiest days. The velvety smoothness of cream cheese against the bright zing of lemon creates this magical moment that makes my taste buds dance with joy. Ever had one of those desserts that somehow feels like a warm hug and a refreshing breeze all at once? This is exactly that. I stumbled upon this recipe during a family gathering where my aunt’s dessert stole the spotlight, and I’ve been perfecting it ever since. Whether you’re celebrating something special or simply treating yourself after a long week (because let’s face it, we all deserve it), these bars hit that sweet spot of indulgence without overwhelming effort.
Why You’ll Love This Recipe
What makes these Lazy Day Lemon Cream Pie Bars special:
• Perfect marriage of textures and flavors
• Buttery graham cracker crust: crunchy yet tender foundation
• Cream cheese layer: adds decadent richness
• Bright, tangy lemon filling: balances beautifully
• Chilling creates magic: flavors meld and intensify
• Sophisticated and comforting dessert
• Bakery-quality results with minimal fuss
• Perfect for baking novices and experienced dessert makers
• Reliable crowd-pleaser
Ingredients for This Recipe
For the Crust:
- Graham Cracker Crumbs: The foundation of our delectable base that provides a sweet, nutty flavor. I always look for fine crumbs for the most cohesive texture.
- Sugar: Adds sweetness to the crust and helps it caramelize slightly during baking. I prefer regular granulated for its neutral sweetness.
- Unsalted Butter, Melted: The binding agent that transforms crumbs into a proper crust. Using unsalted gives me control over the final flavor balance.
For the Cream Cheese Layer:
- Cream Cheese, Softened: The star that creates that luxurious, tangy backdrop. I always use full-fat versions for the richest, creamiest results.
- Powdered Sugar: Its fine texture incorporates beautifully without graininess. I sift mine first to ensure the creamiest layer possible.
- Whipped Topping: Creates that cloud-like, mousse texture that makes these bars irresistible. Store-bought works beautifully, but homemade whipped cream is divine.
For the Lemon Layer:
- Lemon Pie Filling: Delivers that bright, citrusy punch that defines these bars. I’ve found the homemade version offers brighter flavor, but quality store-bought saves precious time.
For Topping:
- Whipped Cream: Adds a final touch of silky decadence and visual appeal. I prefer freshly whipped for special occasions.
- Lemon Slices: These bright garnishes hint at the flavor explosion waiting inside. I always use thin, fresh slices for the most elegant presentation.
- Powdered Sugar: That final dusting creates a bakery-worthy finish. I use a small sieve for the lightest, most even coating.
How to Make This Recipe
Step 1: Prepare the Crust
I start by preheating my oven to 350°F and lining an 8×8-inch baking dish with parchment paper, leaving overhang for easy removal. In a medium bowl, I combine the graham cracker crumbs and sugar, then pour in the melted butter, mixing until every crumb is moistened. The mixture should hold together when pressed between my fingers – that’s how I know it’s perfect. I press this mixture firmly and evenly into the bottom of the prepared pan, using the bottom of a measuring cup for a smooth, compact base. I bake for 8-10 minutes until it’s lightly golden and smells buttery and delicious, then set aside to cool completely.
Step 2: Create the Cream Cheese Layer
While the crust cools, I focus on that luscious middle layer. In a large bowl, I beat the softened cream cheese until it’s completely smooth – no lumps allowed here! Then I gradually add the powdered sugar, continuing to beat until the mixture is light and fluffy. The texture should be silky with a subtle sheen. Finally, I gently fold in the whipped topping using a spatula, taking care to maintain that airy lightness. This gentle folding motion preserves the volume that will give our bars that divine mousse-like texture.
Step 3: Assemble the Layers
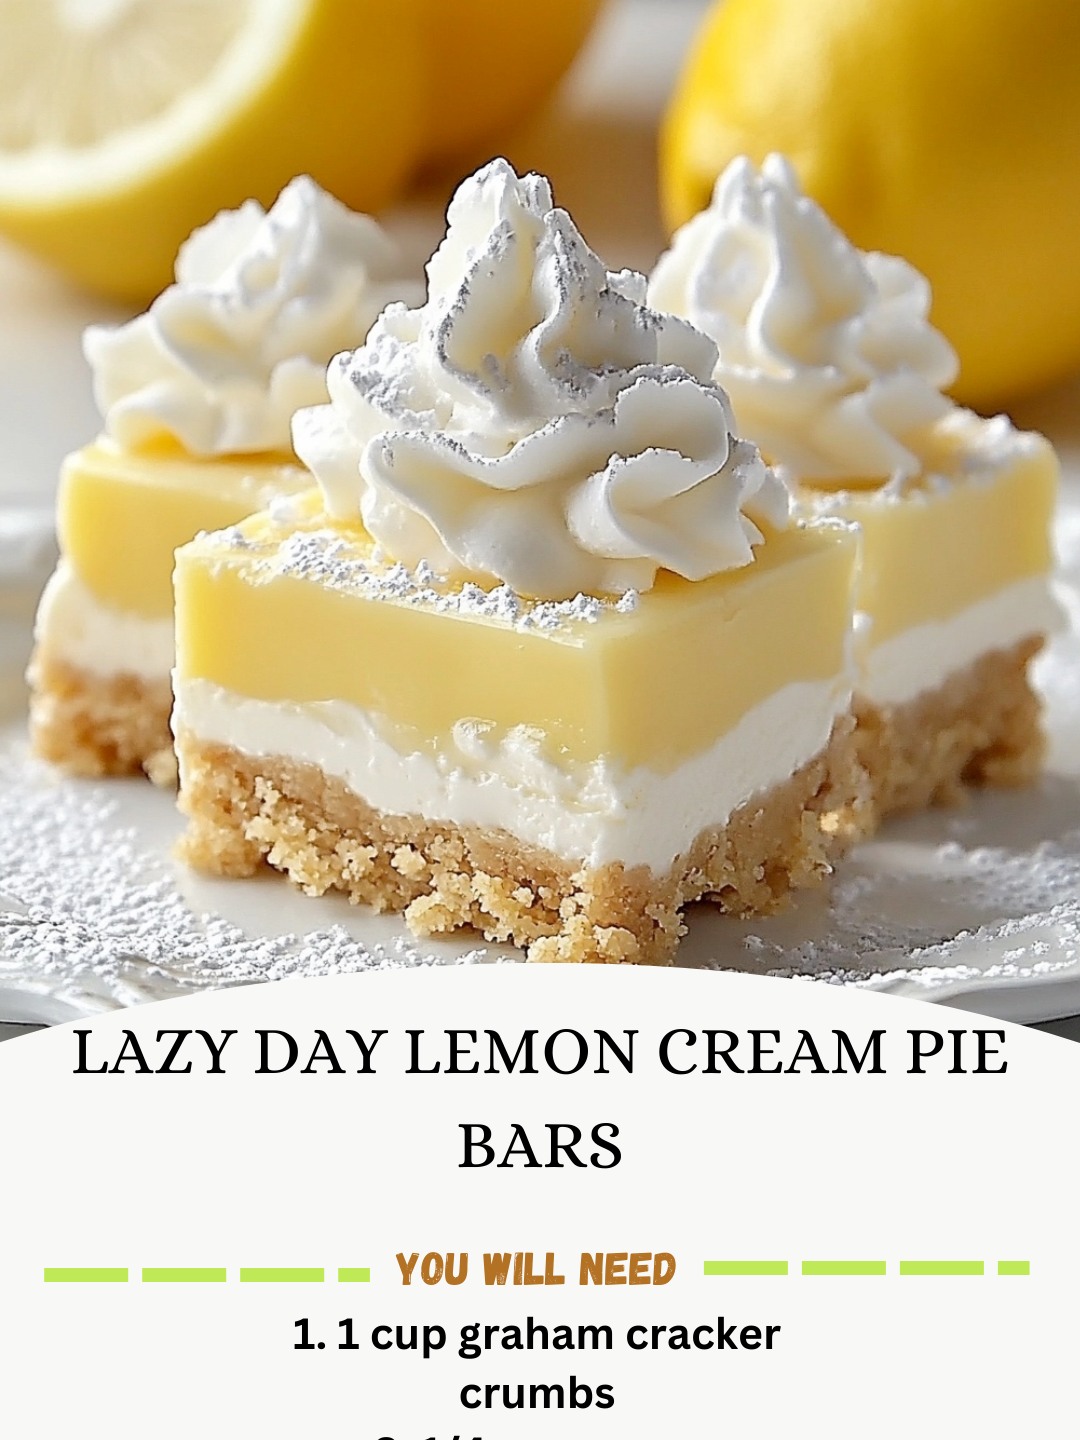
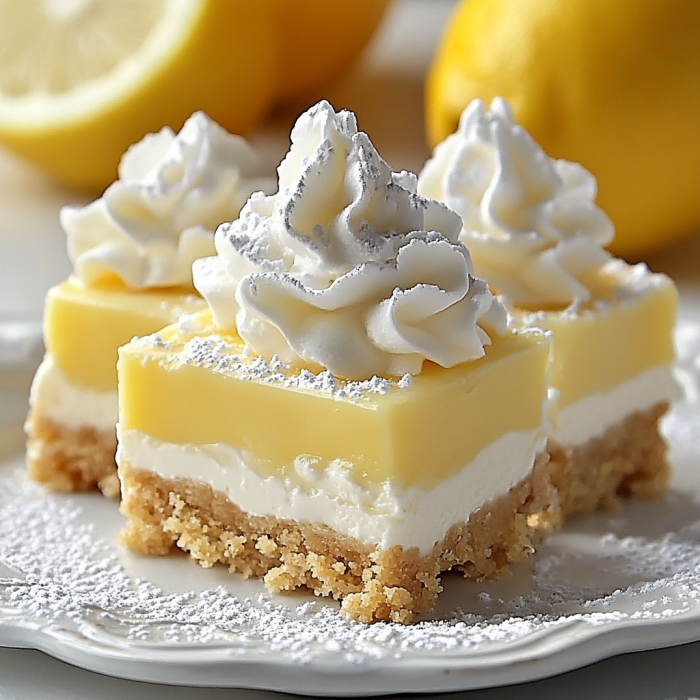
Once the crust has cooled completely, I spread the cream cheese mixture over it in an even layer, making sure to reach the corners. I use an offset spatula for the smoothest finish. Then, I carefully spread the lemon pie filling on top of the cream cheese layer, creating a vibrant yellow blanket that promises that citrusy brightness in every bite. The contrast between the white cream cheese and sunny lemon layers creates a beautiful visual appeal that always makes my heart skip a beat.
Step 4: Chill to Perfection
This is where patience becomes a virtue! I cover the dish with plastic wrap and refrigerate for at least 4 hours, though overnight is ideal for the flavors to fully develop and the layers to set properly. The magic happens during this chilling time as the flavors meld together and the textures reach that perfect balance between creamy and firm.
Step 5: Serve and Garnish
When ready to serve, I use the parchment overhang to lift the entire dessert out of the pan and place it on a cutting board. With a sharp knife wiped clean between cuts, I slice into bars – anywhere from 9 to 16 depending on the occasion. Just before serving, I add a dollop of whipped cream, a thin lemon slice, and a light dusting of powdered sugar to each bar. This final touch transforms them from delicious to absolutely irresistible!
Expert Cooking Tips
- Room Temperature Cream Cheese is Non-Negotiable: I always set my cream cheese out at least an hour before mixing. Cold cream cheese creates lumps that no amount of beating can fix!
- The Secret’s in the Chill: I’ve learned that patience pays off with these bars. Refrigerate overnight for the most well-defined layers and developed flavors.
- For Clean Cuts: I dip my knife in hot water and wipe it clean between each slice. This simple trick creates those picture-perfect edges that make everyone think you’re a pastry chef.
- Don’t Rush the Folding: When incorporating whipped topping into the cream cheese mixture, I fold gently using a figure-eight motion to maintain that airy texture.
- Balance Your Sweetness: I always taste my lemon filling before assembly. If it’s too sweet, a squeeze of fresh lemon juice brightens everything without altering the texture.
Proper Storage
- Refrigeration: I store these bars in an airtight container in the refrigerator for up to 5 days. The flavors actually improve after the first 24 hours!
- Freezing Option: For longer storage, I freeze the bars without the whipped cream garnish. I place them on a tray until solid, then wrap individually and store for up to 2 months.
- Thawing Method: I thaw frozen bars overnight in the refrigerator for the best texture preservation. Room temperature thawing causes condensation that softens the crust.
- Pre-Cutting Advantage: I often cut these into individual portions before storing. This makes it easier to grab just one (or two!) without disturbing the presentation of the whole batch.
Variations and Substitutions
Dietary Adaptations:
- Gluten-Free Version: I substitute the graham crackers with gluten-free cookies or a mixture of almond flour and melted butter for a nutty twist.
- Lighter Option: I’ve successfully used Neufchâtel cheese (⅓ less fat) and light whipped topping without sacrificing too much creaminess.
- Dairy-Free Possibility: Plant-based cream cheese and coconut whipped topping create a surprisingly authentic version for those avoiding dairy.
Flavor Variations:
- Key Lime Twist: I simply swap the lemon filling for key lime for a tropical variation that’s equally refreshing.
- Berry Beautiful: I love adding a layer of fresh berries between the cream cheese and lemon layers for added dimension and color.
- Chocolate Bottom: For chocolate lovers in my life, I sometimes mix cocoa powder into the graham cracker base for a chocolate-lemon combination that’s unexpectedly delightful.
FAQ
Can I make these bars ahead of time?
Absolutely! I find they’re actually best made a day ahead as the flavors develop beautifully overnight.
Why did my cream cheese layer end up lumpy?
Your cream cheese wasn’t soft enough. I always let mine sit at room temperature for at least an hour.
Can I use fresh lemon juice instead of pie filling?
You’ll need to make a proper lemon curd or filling as juice alone won’t set properly.
How do I know when my crust is properly baked?
It should be lightly golden and fragrant, with a firm texture that’s not crumbly.
My bars are too soft to cut neatly. What happened?
They likely need more chilling time. I recommend at least 4 hours, preferably overnight.