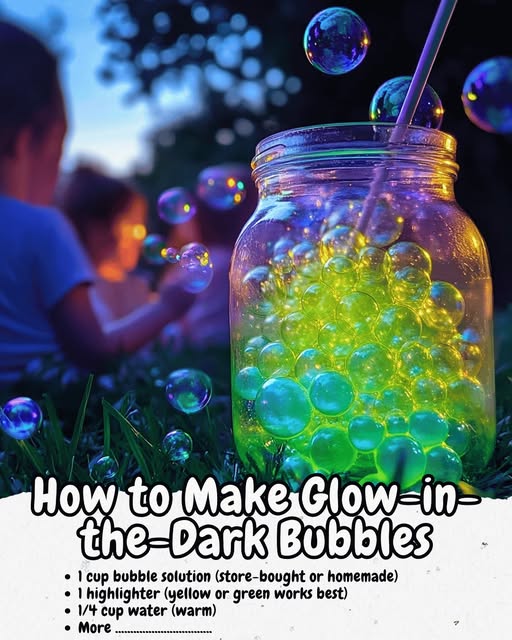
How to Make Glow-in-the-Dark Bubbles – A Magical Blacklight Activity for Kids
Want to mesmerise your kids with a glowing science experiment that’s easy, safe, and incredibly fun? These Glow-in-the-Dark Bubbles are an exciting twist on traditional bubble play, and they’re perfect for nighttime fun, parties, camping, or sensory play.
This version of glow bubbles is blacklight-activated, which means the bubbles glow vividly under a UV light, making it an ideal project for dark rooms or outdoor evening activities. And the best part? You only need a few common household items — including a highlighter and bubble mix — to make the magic happen!
Ingredients & Supplies (Makes 1–2 cups of glowing bubble solution)
✨ Blacklight-Activated Bubble Solution:
- 1 cup bubble solution (store-bought or homemade — see below)
- 1 highlighter (yellow or green works best for vibrant UV glow)
- ¼ cup warm water
- Optional: 1 small squirt of dish soap (for extra foamy bubbles)
- 1 UV blacklight or torch (required for the glow effect)
🧼 Homemade Bubble Solution (If not using store-bought):
- 1 cup warm water
- 2 tbsp dish soap (any clear or lightly coloured brand)
- 1 tbsp corn syrup or sugar (improves strength and elasticity)
How to Make Glow-in-the-Dark Bubbles – Step-by-Step :
1: Make or Prepare Your Bubble Solution
- If using store-bought bubble solution, pour 1 cup into a bowl or jar and set aside.
- To make your own bubble solution, mix:
- 1 cup warm water
- 2 tbsp dish soap
- 1 tbsp corn syrup or sugar
- Stir gently until fully combined — avoid too many bubbles in the mix itself.
2: Extract the Glowing Highlighter Ink
- Choose a non-toxic highlighter, preferably in yellow or green, as these colours glow best under blacklight.
- Remove the felt ink cartridge from the inside of the highlighter pen using scissors or pliers.
- Place the ink core into a jar or cup with ¼ cup warm water and let it soak for 10–15 minutes.
- Stir occasionally and gently squeeze the ink to help the colour release.
- Once the water is deeply coloured and glowing under a blacklight, remove and discard the ink core.
3: Mix the Glow Water with Bubble Solution
- Slowly pour the glowing highlighter water into your bubble solution, stirring gently.
- Add a small squirt of dish soap if you want a foamy boost for bigger bubbles.
- Let the mixture rest for a few minutes so the ingredients settle and combine well.
4: Set Up Your Glow Zone
- These bubbles require a blacklight or UV torch to glow — so find or create a dark environment:
- A dimmed room
- Backyard at night
- A covered tent or fort
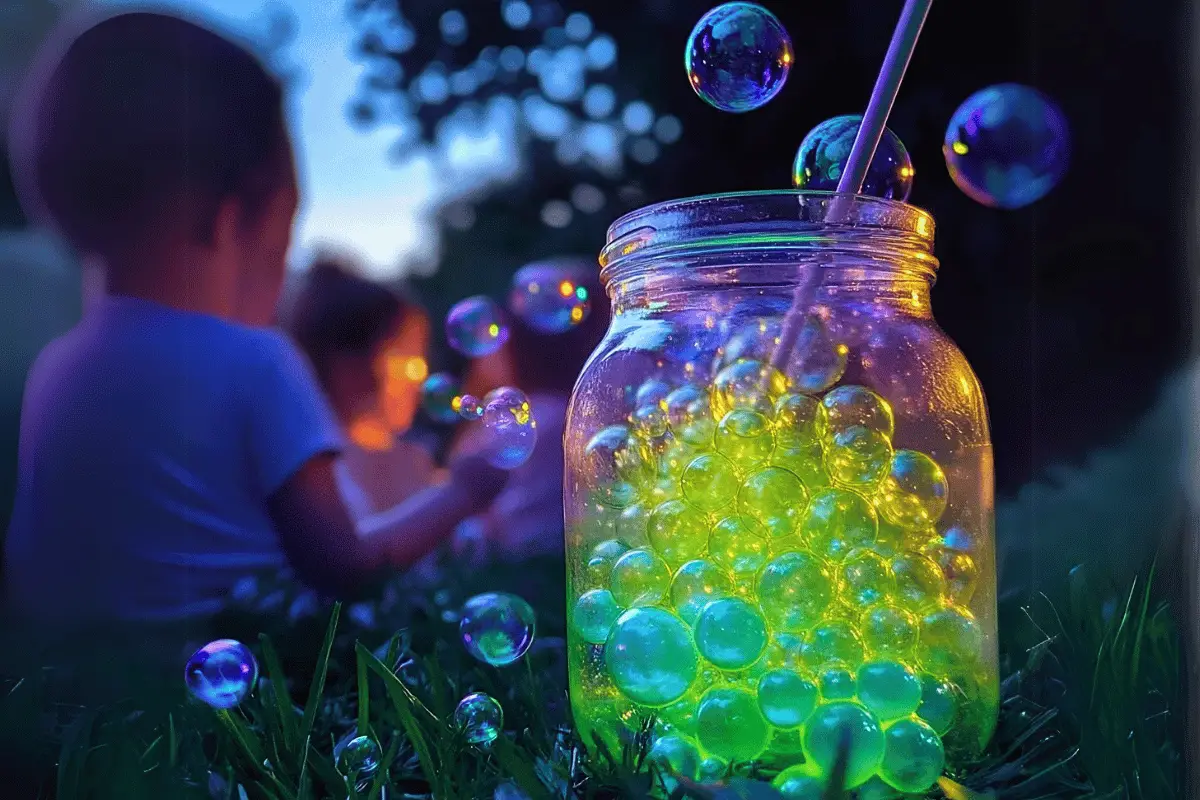
- Shine your UV light over the solution — you should see a bright fluorescent glow.
5: Blow the Bubbles!
- Use a standard bubble wand, straw, or DIY wand (wire or pipe cleaner works well).
- Dip into the solution and blow gently.
- Watch the bubbles glow and shimmer under the blacklight — pure magic!
Safety Notes
- Always use non-toxic highlighters for safety.
- Supervise young children closely — while the solution is non-toxic, it’s not meant for ingestion.
- Avoid getting the liquid in eyes or on clothing — highlighter ink may stain.
- Glow is only visible under a UV light — bubbles will not glow in complete darkness without one.
Tips for Success
- The darker the room, the better the glow — test the solution before play.
- Use a yellow or green highlighter — they emit the strongest UV fluorescence.
- Add a touch of glycerine or corn syrup to strengthen the bubbles.
- Mix gently — vigorous stirring can reduce bubble quality.
- Let the mixture rest 30 minutes before use for best results.
Storage
- Store leftover glow bubble solution in an airtight container for up to 3 days.
- Shake or stir before reuse — some settling is normal.
- Keep out of direct sunlight to preserve colour and effectiveness.
Variations
- Rainbow Glow: Mix separate batches with different coloured highlighters.
- Scented Bubbles: Add a drop of kid-safe essential oil like lemon or lavender for scent.
- Party Bubbles: Add a pinch of glitter to the bubble solution for sparkle under the blacklight.
- Bubble Painting: Blow bubbles onto dark paper for glowing art prints!
🧾 Time Overview
- Prep Time: 15 minutes
- Play Time: Up to 30–45 minutes (or longer with refills)
- Total Time: Approx. 20 minutes (excluding setup)
FAQs
Q: Will these bubbles glow in total darkness?
A: No. They require a blacklight to fluoresce. Without UV light, the bubbles will appear like normal ones.
Q: Are glow bubbles safe for toddlers?
A: Use with adult supervision. The solution is non-toxic but should not be consumed. Always supervise bubble play for young children.
Q: Can I use glow-in-the-dark paint or powder instead of a highlighter?
A: No — most glow paints contain phosphorescent materials that don’t mix well with bubble solution. Only highlighter ink works effectively with UV light in liquid form.
Q: How long will they glow?
A: As long as the UV light is shining, the glow continues. Without it, the bubbles appear transparent.
Conclusion
These DIY Glow-in-the-Dark Bubbles are a playful fusion of science, creativity, and wonder. With just a highlighter, some bubble mix, and a UV light, you can transform a standard afternoon into a glowing, giggling adventure your kids will never forget.
They’re perfect for birthday parties, night-time backyard fun, or classroom science demos — all with a beautiful fluorescent twist. Easy to make, safe to use, and full of glowing charm, this activity is a must-try for curious kids and creative families.
So grab your blacklight and bubble wand, and let the glowing fun begin! 🫧🔦🌟
 100vw, 150px” data-lazy-src=”//www.cookefast.com/wp-content/uploads/2025/04/glow-in-the-dark-bubbles-150×150.png” /></div>
<h2 class=) How to Make Glow-in-the-Dark Bubbles – A Magical Blacklight Activity for Kids
How to Make Glow-in-the-Dark Bubbles – A Magical Blacklight Activity for Kids
- Total Time: Approx. 20 minutes (excluding setup)
Ingredients
Ingredients & Supplies (Makes 1–2 cups of glowing bubble solution)
✨ Blacklight-Activated Bubble Solution:
- 1 cup bubble solution (store-bought or homemade — see below)
- 1 highlighter (yellow or green works best for vibrant UV glow)
- ¼ cup warm water
- Optional: 1 small squirt of dish soap (for extra foamy bubbles)
- 1 UV blacklight or torch (required for the glow effect)
🧼 Homemade Bubble Solution (If not using store-bought):
- 1 cup warm water
- 2 tbsp dish soap (any clear or lightly coloured brand)
- 1 tbsp corn syrup or sugar (improves strength and elasticity)
Instructions
How to Make Glow-in-the-Dark Bubbles – Step-by-Step :
1: Make or Prepare Your Bubble Solution
- If using store-bought bubble solution, pour 1 cup into a bowl or jar and set aside.
- To make your own bubble solution, mix:
- 1 cup warm water
- 2 tbsp dish soap
- 1 tbsp corn syrup or sugar
- Stir gently until fully combined — avoid too many bubbles in the mix itself.
2: Extract the Glowing Highlighter Ink
- Choose a non-toxic highlighter, preferably in yellow or green, as these colours glow best under blacklight.
- Remove the felt ink cartridge from the inside of the highlighter pen using scissors or pliers.
- Place the ink core into a jar or cup with ¼ cup warm water and let it soak for 10–15 minutes.
- Stir occasionally and gently squeeze the ink to help the colour release.
- Once the water is deeply coloured and glowing under a blacklight, remove and discard the ink core.
3: Mix the Glow Water with Bubble Solution
- Slowly pour the glowing highlighter water into your bubble solution, stirring gently.
- Add a small squirt of dish soap if you want a foamy boost for bigger bubbles.
- Let the mixture rest for a few minutes so the ingredients settle and combine well.
4: Set Up Your Glow Zone
- These bubbles require a blacklight or UV torch to glow — so find or create a dark environment:
- A dimmed room
- Backyard at night
- A covered tent or fort
- Shine your UV light over the solution — you should see a bright fluorescent glow.
5: Blow the Bubbles!
- Use a standard bubble wand, straw, or DIY wand (wire or pipe cleaner works well).
- Dip into the solution and blow gently.
- Watch the bubbles glow and shimmer under the blacklight — pure magic!