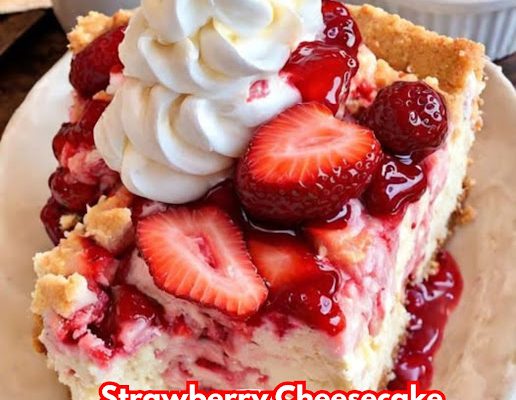
3. Assemble the Cheesecake
- Remove the crust from the freezer and spread the cheesecake filling evenly over it.
- Smooth the top with a spatula for a clean finish.
- Refrigerate the cheesecake for at least 4–6 hours, or until firm.
4. Add the Topping
- Once the cheesecake is set, arrange fresh strawberry slices on top in a decorative pattern or scatter them evenly across the surface.
- Optional: Drizzle with strawberry glaze or melted chocolate for extra flair.
5. Slice and Serve
- Carefully remove the cheesecake from the pan (if using a springform) and slice into wedges.
- Serve chilled and enjoy every bite of this creamy, fruity delight!
Serving Suggestions
- Pair with Whipped Cream: Add a dollop of whipped cream on each slice for extra indulgence.
- Add Variety: Mix in chopped nuts, chocolate chips, or other fruits for added texture and flavor.
- Make It Mini: Use a muffin tin to create mini cheesecakes for individual servings.
Pro Tips for Success
- Use Cold Ingredients: Ensure the heavy cream is very cold for the best whipping results.
- Chill Thoroughly: Allow enough time for the cheesecake to set in the fridge—it’s key to achieving the perfect texture.
- Prep Ahead: Assemble the cheesecake up to a day in advance and store it in the fridge until ready to serve.
- Crush Graham Crackers Easily: Place the crackers in a zip-top bag and crush them with a rolling pin or the back of a spoon.
Final Thoughts
This No-Bake Strawberry Cheesecake proves that you don’t need complicated recipes or endless ingredients to make something truly spectacular. With its creamy filling, buttery crust, and fresh strawberry topping, it’s a dessert that’s as beautiful as it is delicious. Whether you’re serving it at a party or enjoying it at home, this cheesecake is sure to impress.
So grab your five ingredients, mix, chill, and indulge in this effortless, crowd-pleasing treat. One bite of this light, creamy, strawberry-topped cheesecake, and you’ll understand why it’s a must-make for any occasion—or just because! 🍓🧀🍰


